Sunday, September 30, 2012

Tomatoes…

I know you are saying, “It is the end of the summer, why are you writing about tomatoes?”

Last fall we moved new part of the country, and the planting season starts later here. By the time, spring came around my son and I were craving to get our hands into the soil and plant a garden. We were not sure how much shade the trees surrounding the yard were going to give us. We settled on planting in buckets in case we had to rearrange for sunlight.

Every Saturday morning, I get up way to early and visit the local farmers market. One of the venders sells plants and during the spring has tomatoes. My son and I went a little wild and bought eight different varieties.

The tomatoes did ok, but with too much rain this year, a good percentage of the fruit rotted on the vine. We had one powerhouse producer called Jellybean. These little tomatoes look like red jellybeans and have a wonderful taste. Most of them did not make into the house; we would pop them in our mouth between swimming in the pool. 

Daily harvest of Jellybean tomatoes

Here we are now at the end of September, and my tomato plants have decided to go bonkers pumping out fruit. One plant produced three tomatoes the entire summer, now it has close to thirty good size green tomatoes.

So what should I do with them? I could fry them, but my family is not big on fried tomatoes. I cannot process them; I do not have a pressure cooker. I have made salsa; but I do not have a way to process it. I could be freeze them, but the freezer is bursting now with freezer jam and other tasty foodstuffs.

My only option is hope the tomatoes will a get a chance to ripen. Then, I can make the lovely Tomato Pie recipe I found over on Christy Jordan’s Southern Plate this summer. I have made this and it is good as written, but my family would not touch it.
If you would like the recipe here is the link http://www.southernplate.com/2012/06/tomato-pie.html

I personally did not care for the mayonnaise on top. Christy states you could not taste it, I did.  For my family to eat this I would follow the step of salting the tomatoes and letting them sit, delete the mayo, double the fresh basil and balsamic vinegar. Increase the layering while using Italian cheeses, like Mozzarella, Parmigiano-Reggiano, and a Smokey Provolone. This way would be making it more of a sauce less tomato pizza.

This is what makes cooking is so much fun, you get to tinker and adjust recipes to your preferences.

As always, pass this along to your friends!

Saturday, September 29, 2012

Stop Your Seasoning Packet Addiction

We live in a society where everything has to be fast, on demand and convenient. It is easier and faster to go through a drive through instead of cooking. It is more convenient to pop a frozen pizza into the oven than making it from scratch. Instead of making school lunch for your children, you buy pre-packaged meals from the grocery store.
What about your spices, do reach for the readymade seasoning packets? How many times have you bought garlic salt or garlic pepper? Have you started to make tacos, only to find out  you did not have seasoning packet? Or you change your meal plan because you just did not want to get back in the car and drive the mile to the store for one item.
Well I am going to show you how to make your own, save money, cut your sodium, and sugar intake. If you you have corn or milk allergies prevent you from having a reaction. These are simple and quick to make. Most of us have the ingredients already in our pantry or spice cabinet. With your assistance, your children can help you make these on a rainy afternoon.

 So let's get started!
Garlic Salt: a 6.49-ounce bottle of Adams brand will cost around $2.50. McCormick 9.5-ounce bottle is around $3.50. I know that does not seem like a lot of money but over time it adds up. Let me ask you a question, do you have garlic powder and salt in your pantry. Yes. Then why not just make this?
Garlic Salt or Pepper recipe: 3 parts salt or pepper to one part garlic… there was that so hard? You can make this by teaspoons, tablespoons or cups. I use tablespoons and to be honest I use a two to one version. I mainly use garlic salt, when I make a knock off version of Olive Garden bread sticks.

Any person, who has to watch their salt intake for medical reasons, will tell you sodium is very difficult to track. If you consume food with spices that add nice flavor, you can almost eliminate the sodium all together. Have you checked what the sodium levels can be in your favorite seasoning packet? I have. McCormick  Taco Seasoning has 300 mg of salt, why? Taco Bell brand has sugar in their taco packet and McCormick has corn syrup. All of them have at least one preservative if not more. Below is a picture of a McCormick Taco and Fajita season packets ingredients. Why is there milk, coloring, and corn syrup in these?

Taco Seasoning
Fajita Seasoning


Taco Seasoning: a packet is approximately 2Tablespoons of seasoning and will cost around a dollar and a quarter. Again, you might have these items already sitting in your spice cabinet waiting to be used.

Homemade Taco Seasoning

3 tablespoons chili powder
1 teaspoon garlic powder
1 teaspoon onion powder
1 teaspoon crushed red pepper
1 teaspoon dried oregano
1 tablespoon paprika
3 tablespoon ground cumin
1 tablespoon black pepper


Fajita Seasoning is not much better than the Taco Seasoning when it comes to salt and preservatives. The one item you have to watch out for in making your own Fajita seasoning is the MSG in the bullion cube. If you look at the labels you might be able to find one without the MSG.
1 teaspoon Paprika
2 teaspoons of Chili Powder
½ teaspoon Onion Powder
½ teaspoon Garlic Powder
¼ teaspoon of Cayenne Pepper
¼ teaspoon of Crushed Red Pepper
1 Tablespoon Cornstarch/ or Arrowroot
¾ teaspoon crushed Chicken Bouillon cube

 Did you know your ground spices only last year? How many of you are saying, “I have had a bottle of pumpkin pie spice for three years now.” I say it is time to make some instead of buying it. Pumpkin Pie only uses 1 Tablespoon, the smallest bottle from McCormick is 1.12 ounce that is sold for an price of a whopping $4.49!!
Pumpkin Pie Spice:
½ teaspoon of ground cinnamon
1/8 teaspoon of ground cloves
¼ teaspoon of ground ginger
¼ teaspoon of ground nutmeg

When I make up spice mixes, I store them in recycled glass jars. I save every glass jar we use, wash it and save them for future use. Not only can you use them for your spices, but for saving Bacon grease (please refrigerate) or discarding used cooking oil or grease from pans.  If you do not save your jars, try plastic containers or zipper storage bags to store your mixes.


As always, make sure you pass this along to your friends!
http://ohthatisyummy.blogspot.com/

Friday, September 28, 2012

Battle Colds and Boost Your Vitamin Intake

The temperature outside Tuesday morning was forty-four degrees; summer is over. Bring on the cold and flu season. In our house, we fight the cold and flu season with fruit smoothies.
 If your children are mine, getting them to swallow a vitamin pill can be more hassle than it is worth. This tasty smoothie has solved the "swallow your pill" fight in our house. We make this two different ways, depending on which ingredient is on hand.  One variation is with Yoplait Light Yogurt, the other with Simply Orange brand orange juice.
I will buy and freeze fresh fruit in the summer for winter use, but you can buy cut-frozen fruit in the freezer section of the grocery store.
This recipe will also accept a vanilla flavored, whey protein powder, without altering the flavor
 
Ingredients:
1 cup of Simply Orange, orange juice / Or 1 container of Yoplait Light yogurt (vanilla, or one of the fruits in the smoothie)
6 whole strawberries, fresh if you have them, can be frozen
1 cup sliced peaches, frozen
1 medium banana,
¼ cup of blueberries, frozen
(If you are using fresh fruit add 6 ice cubes)
Directions:
Place orange juice in blender followed by, blueberries, strawberries, banana, then peaches (and ice if needed)
Blend on high until smooth, if need be you can add warm water ¼ cup at a time.
Should make 16 plus ounces
As always, please pass this page on to your friends! 
http://ohthatisyummy.blogspot.com/

Thursday, September 27, 2012

Flavored Olive Oils

The holiday season will soon be here. The season also brings parties, family gatherings, and yummy food. One of those tasty treats might be crusty bread and infused olive oil.

 These infused oils can be costly if you purchase them in the store. On average,the lowest price I found for a garlic olive oil was $19.95. Why pay that much, when you can make it for a fraction of the cost?

 Around the holidays, infused oils work well when you need a host gift. Why show up with the traditional bottle of wine or plant, when you can bring homemade flavored olive oil?

Stop shaking your head in doubt, and saying this is too difficult or you do not have the time. I promise this is simple to make and takes little effort or time on your part.

The first step, deciding on your olive oil. Since I am going to flavor it, I usually get an inexpensive brand of extra virgin olive oil. If you keep an eye out for sales advertisements, you can sometimes get great deals. The Food Lion grocery stores sometimes have the pint bottles on sale for buy one get one free. World Market/Cost Plus will also have excellent same day sales on olive oil.

Next, you will need to decide what flavors you want to make. I have made, garlic, rosemary garlic and cayenne pepper. For garlic, you will need one head of garlic peeled. Leaving the cloves whole is preferred, but you can crack the cloves to remove the skin. Place garlic in your crock-pot and add olive oil, I use either a 16-ounce or a 24-ounce bottle. Cook on low for six hours, turn off heat and cool. When the pot is cool enough to handle, remove garlic and place in bowl for later. Strain oil through doubled cheesecloth into the jar or container you will be storing your oil. It is important there are no bits of garlic in the container. The reason is because garlic is water based, and we do not want to grow any botchalism.

Rosemary garlic olive oil is made the exact way as the garlic. Add a sprig or two of fresh rosemary to the pot with the garlic and olive oil. Again make sure to remove the entire sprig when done.

Cayenne pepper uses the same amount of oil and the same cooking time. I use four or five whole dried cayenne peppers instead of fresh. Dried peppers will float in liquid. What I suggest is make tiny little slices along the pepper so the oil can get in and the flavor out. When cool you will still need to strain the oil through the cheesecloth. If the peppers are intact you can add them or fresh (dried) peppers to the bottle.

I usually make the pepper oil once a year. I only use it when I want to spice something up like roast vegetables or when making pot stickers. I make the garlic several times a year and use it  daily for cooking.

Now for those garlic cloves you set aside. You can make your own garlic butter, by either making your own butter or soften 1 cup of whole unsalted butter and blend together with the cloves. On the other hand, you can skip the butter. Slice a baguette and spread the cloves on the slices like butter.

Time to make more....

Wednesday, September 26, 2012

Southwest Potatoes

Please pass this page on to your friends! http://ohthatisyummy.blogspot.com/
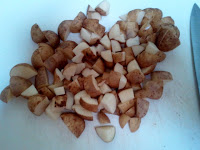
Pan-fried then baked these potatoes pack a lot of flavor. This versatile side dish that could be used in many ways. Without the cheese topping, these would be great with scrambled eggs or take it step further and serve in tortillas with eggs, bacon or sausage and a little salsa.
Serve with the cheese and sour cream for a Taco Bell knock-off dish, or add left over roast chicken and serve in tortillas. Whichever way you choose these potatoes will have your family coming back for more.

Ingredients:
2 lbs of small potatoes diced into 1 inch pieces     
2 tablespoons of cumin
2 tablespoons of garlic powder
1 small package of Velveeta
1/3 cup of salsa
2 tablespoons of canola oil (vegetable oil, bacon grease would be the wonderful!)
¼ cup of sour cream


Directions:
Preheat oven to 475°F
Place potatoes, cumin and garlic powder in plastic storage bag or large bowl, toss until potatoes are well coated.
In large oven safe skillet warm oil, add potatoes and pan fry for ten minutes or until golden brown and tender.
Place skillet in oven for ten minutes stirring at five minutes.  If needed cook an additional five minutes (15 minutes total) until potatoes are crispy.
Slice Velveeta into 1 inch cubes, place in microwave safe bowl (I prefer my 8-cup Pyrex measuring cup) with salsa, cook on high, two minutes at time. Stir between intervals until the cheese is melted and smooth.  
Place ¼ to ½ cup portions of potatoes on dish, topping with cheese and a teaspoon of sour cream
We get 4 to 6 servings from this dish

Tuesday, September 25, 2012

What is it?


These little beauties created a buzz on Saturday at the farmers market they are called Zephyrs. You are right, they look like a cross between yellow squash and zucchini, that is exactly what they are!  You can cook them up and serve them anyway you would yellow squash or zucchini. I don’t know how well they might be in zucchini bread, but they are tasty.
I sliced them in half lengthwise before sprinkling my cayenne pepper olive oil and a touch of salt. I then placed in a grill basket. (If you slice them lengthwise, you can skip the basket and place right on a hot grill.) We used a mesquite charcoal Sunday night; they came off with a spice, smokey flavor to them. Grill ten minutes on each side.

Monday, September 24, 2012

Oven Roasted Green Beans Almondine

Last year for Thanksgiving, I made Green beans Almondine. I did not really care for the part of pre-cooking the beans then dunking them in ice water. I took that step out and roasted the beans in the oven. This summer at the farmers market, I bought several different varieties of beans and subjected the kids to taste testing. We have decided that the Eagles variety is the ones we like the best. They have a great taste, not stringy and freeze really well.
I have been buying a pound or two at a time and freezing them throughout the summer. Saturday I was buying another pound and half and the women told me it was their last weekend until spring. They were gracious enough for me to take their photo at way to early before seven clock in the morning.
Oven Roasted Green Beans Almondine
¼ cup of butter or margarine
1 pound of green beans, whole
1 cup of slivered of sliced Almonds
2 Tablespoons of minced garlic
Preheat oven to 350°F
Wash and snap ends of bean, leaving whole.
Melt butter in a 2qt baking dish, add almonds and toast lightly. When almonds are brown, add garlic and beans to the dish, making sure beans are coated with remaining butter.
Bake for ten minutes before turning beans over, cook for another 5 to 8 minutes before removing from oven. Salt and pepper to taste, sometimes I will sprinkle crushed red peppers on beans. Beans should have a small amount of crispness to them.

Sunday, September 23, 2012

Kit’s Margarita Recipe

Have you ever had margarita from scratch? I am talking real lemon and lime juice not a mix out of a bottle? If you have never had one from scratch, you are in for a treat! We have found it is best to make “the mix” a few days ahead of time, if you can hold for a week it is even better.
“The Mix”:
½ cup of fresh squeezed lime juice
½ cup of fresh squeezed lemon juice
¼ cup of white sugar
Place "the mix" ingredients in a glass container, I use a clean jar. Shake until sugar is dissolved and store in the refrigerator for up to a week.
When ready to drink Margaritas combine:
1 cup of Tequila
1 cup of Triple Sec
Mix
Serve over two cups of crushed ice
**If you like your Margaritas frozen pour all ingredients into a blender and blend until frozen.
Serve in a glass with either sugar or salt on the rim.


Saturday, September 22, 2012

There are 4,001,892 ways to cook a potato


I am not sure about everyone else, but I feel like I have gained ten pounds just writing all the recipes this week. How about we lighten up with Scalloped Potatoes? I know you hear Scalloped Potatoes, the last thing you have in mind is light and healthy. 
Like most recipes this calls for salt, I do not add salt to my recipes. Most of the time you do not notice the difference, we get enough salt in our diets from processed foods. When my husband and I got married. I noticed that every time we ate, he loaded his food with salt and pepper even before tasting it. I figured he was going to salt his food before tasting it, there was no reason to add the salt. Over the years, he has given up this mind-set and now tastes before salting. That being said if you would like to add salt to this recipe please add ¼ teaspoon.
This recipe was passed out at a Weight Watchers meeting: 
Scalloped Potatoes
Makes 4 servings
2 large baking potatoes, thinly sliced
2 onions, thinly sliced
¼ cup of minced parsley, fresh
3 Tablespoons of all-purpose flour
¼ teaspoon of black pepper
¼ teaspoon salt (try using garlic powder instead of salt!)
2 cups of hot skim milk
1/3 cup of shredded reduced fat cheddar cheese ( I always used more)
Directions:
Preheat oven to 350°F. Spray 10” X 6” baking pan with nonstick cooking spray
Layer one-third of potatoes and onions in the bottom of the pan. Sprinkle evenly with half of the parsley and flour. Repeat the layering once more, ending with the potatoes and onions. Sprinkle evenly with pepper and salt (garlic)
Pour the milk over the top and sprinkle with the cheese. Bake until the potatoes are tender and the top is browned, about 1 hour and 10 minutes.
If you make this recipe with salt, here are the nutritional values per serving:
Calories 215, total fat 2g, Saturated fat 1g
Cholesterol 9mg, Sodium 284 mg,
Total Carbohydrate 38g, Dietary Fiber 4g,
Protein 11g, Calcium 267mg

Friday, September 21, 2012

So you have roasted a whole chicken for dinner, what do you with the leftovers?

We all have a million and one recipes for chicken, it is so adaptable. When I roast a whole chicken, I pick every tinny tiny bit of meat off the bone I can. I might seem time consuming but between the wings, back, and those bits of the breastbones, you can gather almost a cup of meat. Why throw away enough food for another meal? Why throw away money?
You have played vulture and stripped the meat from the bones, now what? You can always use it in a salad, but have you thought about making a warm, fork licking, savory potpie? Now do not cringe and say "no, too much work" or "I don’t have time to make a potpie!" Ah but you do, and I promise it is easy to make. You can make it when you get home from work today if you have the ingredients.
I never made a potpie before because:
A.      I thought it was difficult and it intimidated me.
B.      I cannot make a beautiful piecrust to save my life. I keep trying, but it just is not blue ribbon, fair pretty.
C.      Always went to the store and bought frozen ones, not any more!
One day last winter, I sat and looked at recipes for Chicken Potpie. I then printed out my four favorite recipes, combined what I liked best about each to make one recipe.

Next came the piecrust. I can make a crust scratch, and do not even mind doing it. But what about when I am short on time or do not want to tackle making a piecrust? No problem, I cheat and go buy the dough already made. Mine still is not pretty, but I will only improve with practice.
My family loves this recipe and usually gorge themselves to the point there are no leftovers... pitty

Chicken potpie
Ingredients:
1 double piecrust dough for 9 inch pie (I used a Food Lion Brand)
1 cup boneless skinless chicken (you can use a breast, cut into small bite size pieces)
1 cup sliced carrots
1 small potato, peeled and cubed into bite size pieces
1/2 cup frozen peas
1 cup chopped celery
1 cup chopped onion
1/2 cup of butter (yes-real butter, unsalted would be best)
1/3 cup of all-purpose flour
1/8 teaspoon of salt*
2 teaspoon of pepper*
1 teaspoon of garlic* or one fresh minced clove
* I usually just eyeball and go by shakes of container, but those should be good estimates
2/3 cup of milk (1%)
2  chicken bouillon cubes (I use Knorr)
1 3/4 water drained from vegetables
1 can of Campbell’s cream of chicken soup
Directions:
Preheat oven to 425 degrees
In saucepan, combine carrots, peas, potato, celery, salt, garlic and 1 teaspoon of pepper. (If using uncooked chicken add to pot) Add enough water to cover vegetables, add bouillon boil for 15 minutes. Remove from heat and set aside.
In skillet over medium heat, melt butter and cook onions until soft and translucent.
 Drain off 1 ¾ cup of broth from the vegetables and reserve. Drain any remaining liquid from vegetables and set aside.
To your skillet, stir in flour and pepper then slowly stir in milk, cream of chicken soup then the reserved broth until well-blended making thick gravy.
Place bottom piecrust in pie plate; add chicken and vegetables making sure bottom is well covered. Pour hot liquid over mixture. (Depending on your pie plate you might have extra vegetables and gravy mixture. Reserve them, and pour over a baked potato the next day for a hearty lunch!)
 Place top crust over mixture, seal edges, and trim any excess. Make several slits in the top to allow steam to escape. Wrap edges of pie with foil to prevent burning.
Bake in preheated oven for 30-35 minutes or pastry is golden brown and filling is bubbly. Cool for 10 minutes before serving.

Thursday, September 20, 2012

Stew or Soup? You Decide...

My parents were born in raised in Kentucky, my husband’s in Texas. Here lies the base to an eighteen-year long debate over is it stew or soup.

Growing up when mom made stew it was a thick gravy sauce, with beef, potatoes, peas and a single bay leaf that always managed to end up in some ones bowl. Mom served it with bread and butter.

My husband grew up with stew that was broth based, beef, potatoes, carrots, tomatoes and one onion. He eats it with crackers.

Can you see where the debate comes from?

My loving husband states it is because he is from the south and they put tomatoes in everything. I have been deemed a Yankee. Well I hate to break this to my husband, but his father's side of the family was not even American's during the Civil War! When the namesake did immigrate to America, he went to Kentucky. Therefore, if I am a Yankee, he is too!

I will leave each of you to decide which label you would like to classify this recipe, in our house it is called "Oh, that’s good!" 
If you have a picky eater like mine. Try a ladle full with only a small bit of broth and top with shredded cheddar jack cheese.

Paddy's Beef Stew (Soup)
1 ½ to 2 lbs of beef stew meat or roast cut into 2 inch pieces
1 yellow onion, coarsely chopped
3 carrots sliced
4 large potatoes, chopped to bite size pieces
2 large (28-30 oz) cans of whole tomatoes
Ground pepper
1 Tablespoon of vegetable oil
In soup pot, add oil and brown stew meat (personally, I add crushed garlic or garlic powder to the meat at this point.) Add enough water to cover meat, cover pot and let simmer until meat is tender. (If you have meat tenderizer go ahead and sprinkle some in) Simmer until almost all of the water has evaporated from pot, usually takes 1 ½ hours.
Add potatoes, onion and carrots.  Crush tomatoes while adding to pot along with the juice.
Cover pot and simmer until vegetables are done, season with pepper to taste.

Crock-pot version – Yes, you can make stew in a crock-pot!
Place meat tenderizer, stew meat, pepper, (garlic,) onion and enough water to reach almost halfway of crock-pot. Set to highest setting, replace lid and let simmer for 6 hours.
After six hours, water should be mostly gone. Place carrots and potatoes in a microwavable dish (I prefer an 8-cup Pyrex measuring cup) cover with water and microwave on high for ten minutes. The vegetables should fork tender but not completely cooked. Add tomatoes, potatoes and carrots to crock-pot and let cook for an hour on high temperature.

Wednesday, September 19, 2012

Comfort Food - Red Beans and Rice

Webster Dictionary defines comfort food as food prepared in a traditional style having a usually nostalgic or sentimental appeal.
Red Beans and Rice is a comfort food in our house.
My husband was stationed in Virginia for nearly a decade and we loved every minute of it. During our tenure, we became with close friends with a two families. Cheryl and Victor adopted us into their family. They become adopted grandparents to our children, since all the grandparents lived across the country. With Cheryl and Victor, we had the loud, extended family gatherings. Holidays were not just a meal with them. These were events, with good company, great food and always served with Cheryl's yeast rolls made from scratch.
Our other extended family is Ron and Cindy. Here are two people from radically different parts of the country. Cindy is from Vermont; Ron is a crazy Cajun from Louisiana. Ron and I trade Roux and Andouille sausage for BBQ sauce. Since certain ingredients are only available once a year, I usually have a debt to make up when it comes time to make BBQ sauce.
I will not attempt to make Ron’s Gumbo it is just too perfect. Red Beans and Rice I have been tinkering with for several years now. Whenever I ask my family what they want to eat, my youngest and fussiest eater asks for Red Beans and Rice.
I usually make Red Beans and Rice in a crock-pot, so this requires a few days advance planning.  I know there are times when you want it now, not two or three days later. I am going to provide the recipe for both versions.
Two things to look out for when buying a ham hock:
         Try to find one with as much meat as possible. I have found the best ones at the local farmers market.
         Have a potato on hand. Once I bought a ham hock from a different grocer, the ham hock was incredibly salty. If the red beans are too salty, cut raw the potato into chunks and place in your pot, remove before serving.


Red Beans and Rice
Cook time 3-4 hours on stove top
1 pound of dried red beans
1/2 to 3/4 pound smoked ham hock
1 1/4 cups water
1/2 teaspoon onion powder
1/2 teaspoon garlic salt
1/4 teaspoon red pepper
1/4 cup bacon drippings
1/4 teaspoon freshly-ground black pepper
4 to 5 cups long grain rice, cooked
*I use Tony Chachere’s Creole Seasoning instead of spices above. I would say use at least 1 Tablespoon*
Wash and sort red beans before placing in deep pot with 8-9 cups water. Bring to boil for 2-3 minutes. Remove from heat, cover and let set for 2 hours.
Drain off water and refill pot with fresh water before placing back on heat at moderate to slow boil.
Add ham hock and seasonings to pot. When meat is falling off the hock, remove from heat until cooled enough to remove meat from the bone. Before placing meat back in pot, use a potato masher and mash half of the beans, this should cause a creamy texture. (Alternative is to remove two cups of beans and place in food processor for 4-6 seconds) cook slowly on low heat stirring often. Add cooked rice and gently stir well before serving.

Red Beans and Rice in a Crock-pot
1 pound of dried red beans
1 pound smoked ham hock
 Water
1 to 2 Tablespoons of Tony Chachere’s Creole seasoning
4 to 5 cups cooked long grain rice
Wash and sort red beans before placing in deep pot with 8-9 cups water, soak twelve to twenty-four hours. Drain and rinse beans before placing in 6-quart crock. Add ham hock and enough water to cover both beans and hock before adding Creole seasoning. I put a light coating of seasoning over the entire pot. Replace lid and cook on low for six hours
Remove ham hock, place on a plate to cool while you tamp the red beans with a potato masher for one minute. This will cause thickening giving the beans a creamy sauce like texture. Shred meat from the ham hock and stir back into the bean mixture. Replace lid.
I actually turn off the crock-pot at this point and let the pot stand for one hour. If you cook often with a crock-pot, you know they stay hot for a long time. This will give the beans to thicken up more without cooking them further and making red bean paste. If you end up with paste, just stir in ¼ cup of water.
Serve over cooked rice and cornbread with honey, Yum!


Tuesday, September 18, 2012

Spiced Coffee

It is no secret I have a love hate relationship with coffee. Growing up, my bedroom was closest to the kitchen. My parents loved to grind their own coffee beans, before grinding your own was fashionable. Every morning I woke to beans being poured into the antique crank coffee grinder. The grinding seemed to take hours in "kid" time, in actuality it took no longer than five minutes.

I took my first job when I was a junior in high school and for Christmas, I thought I would get my parents something special without saying "Hey can I have money to go Christmas shopping?" Poking around Sun Valley Mall, I came across Williams Sonoma. My mom loved to shop this store for all of her gourmet club meetings. I had my "A Christmas Story" moment when there in the window was a Braun electric coffee grinder! Electric had to be quicker method of getting those dang beans ground so I could sleep, right?

Christmas morning came with happy parents laughing I did not like the hand grinder and bought them an electric one. There I sat smiling ear to ear, because on December 26, I was going to sleep in past six! I woke the next morning to a sound, which could be compared to a locomotive running wide open, the steam whistle blowing while chugging through a convent! Did I mention I hate coffee?

For me to drink coffee it has to be 60% dairy, 30% sugar, and 10% coffee. I have to kill the taste of the coffee somehow. I still do not understand how something that smells so wonderful, tastes so bad!

When my husband was stationed in Texas, I worked in a county probation department. Where I became friends with Terra. Even though, we were born one day and at least fifteen years apart we clicked like we had known each other for years. For our birthdays, we would bring each other a Starbucks Venti Carmel Frappuccino. One day Terra let me try her coffee with cinnamon in it, hmm not too bad... but I still needed it fully loaded with sugar and milk.

Yesterday morning after enjoying a slice of Pumpkin Bread, I decided to try something. I had made an 8-cup pot of coffee earlier, (I told you I love the smell of coffee.) I threw out the coffee filter and grounds, then added a fresh filter to the basket. To the basket, I added 1 teaspoon of nutmeg, cinnamon, and ground cloves (I would suggest cutting the cloves back to half a teaspoon.) I also added something I knew would not work but I tried it anyway. I added 1/2 cup of white sugar into the mixture. Next I poured the coffee from the carafe back into the coffee maker and re-brewed it (I can see my dad saying here "oh yuck." Nevertheless, in reality I did not re-brew the coffee since it did not go through the grounds again.) The sugar did not work that well, since it would not dissolve quick enough to make it through the filter without me having to stir it.

Minus the sugar mess, the coffee came out tasting wonderful. The spices gave it a warm rich taste that made me think of winter. I would pair it with the Pumpkin Bread Recipe or even Gingerbread during the holidays for something extra special.
 

Monday, September 17, 2012

The Panic of The Lost Pumpkin Bread Recipe

I have a stack of recipes that are loose and unbound. They are either hand written, or printed from the internet and emails. When I want a recipe, I pull out the stack and start shifting through it. I am the only person in the house who can touch the stack. I know exactly where  a recipe should be and they should never get out of “my” order.
Huge panic erupts when I cannot find a recipe. The thought or idea that I have lost or miss placed a recipe is devastating. Yes, yes, yes, I know, I should have a better system for keeping recipes, but I am a procrastinator and a creature of disorganized chaos.
Two weeks ago, I made pumpkin bread. This weekend I went looking for the recipe and it was nowhere to found. I went through the stack of recipes twice and could not find it. My over active imagination started churning with the “what if’s.” What if it got thrown away when my husband cleaned the kitchen? Did Lily, our paper-shredding cat, get her paws on it? Was it mistaken as scratch paper and used by the kids for math homework? Gasp!
Lily, A.K.A. The Paper Shredder
  So panic with setting in, I start pulling cookbooks out of my cabinet and riffling through them. This is one of those recipes, I do not need to read what is on the paper; it is burned in my memory. Though without the paper in my hand, I cannot remember any of it besides canned pumpkin.
 After emptying the cabinet, the recipe is nowhere to found. My kitchen is a disaster, and Lily was stalking recipes that have fallen on the floor. Dejected I sit down at my computer, only to look over at the printer. Yep, sitting on top of the printer is my recipe for pumpkin bread. I placed it there to scan into the computer, in case I ever lost the paper copy.

Pumpkin Bread
Ingredients:
1 cup vegetable oil
3 large eggs
1 16 oz can of pumpkin (not pumpkin pie)
3 cups of all purpose flour
3 cups of sugar
1 teaspoon of ground cloves

2 teaspoons of cinnamon
2 teaspoons of ground nutmeg (if you have the time, grind it fresh)
1 teaspoon of baking soda
½ teaspoon of baking powder
** Optional you can add either add 1 cup chopped walnuts or pumpkin seeds**
Directions:
Preheat oven to 350° F. Prepare two 9X5X3 inch loaf pans by buttering and flouring.

In large bowl beat sugar and oil until blended. Mix in eggs and pumpkin.
In separate bowl sift remaining dry ingredients, and then slowly stir into pumpkin mixture.
Divide batter between the prepared pans, sprinkle with nuts and bake for 70 minutes or until toothpick comes out clean.
Cool on wire racks.
This recipe can be used to make one dozen pumpkin muffins, prepare tins as above or use cupcake papers. Bake for 20 minutes, insert toothpick to check doneness